Have you ever watched a performance of an artist you loved and wondered, how do they sound so good?
Especially when they make their instrument sound like it’s swooshing. Well, a lot of the time, they’ll have some help.
Flangers are the reason behind the swoosh sound that you hear in many guitar solos. The effect that makes it sound like more than one guitar is playing.
So, if you want to know what is a flanger and how you can achieve the effect for yourself, you’ve come to the right place.
Let’s take a look at what flanging is and how you can use it.
What Is a Flanger?
A flanger is a device that can alter audio signals. It mixes two signals together to make a flanging effect.
You can connect your instrument to the device and it can create a resonating sound.
Audio Signals and Phase
Before we dive into flanging, there are a few key concepts you need to know. The first is an audio signal.
When air particles vibrate in a specific way, they can create sound. This is how we speak to each other.
Our vocal cords vibrate the air inside our voice box to make different sounds. These sounds are full of information.
Measuring amplitude, frequency, and wavelength turn sound into an audio signal. We can use these signals in many applications, like singing and playing music.
This brings us to our second concept, audio signal processing. If you can measure something, then you can change it. You can change the characteristics of an audio signal to achieve different effects.
You can make a signal louder or you can change its speed. Each change will have a distinct effect on the signal.
There are many ways you can alter a sound signal. One of these ways is flanging.

Another important concept is a phase. To help you understand, think of sound as a wave.
When you drop a marble into a bucket of water, you can see the waves rippling. Sound works in a similar way. But, instead of water, it uses air.
These waves form in a repeating pattern. Each wave has a peak and a trough. We call the location of the wave in the cycle the phase.
What Is Flanging?
Flanging is an audio effect created by mixing two signals. It’s an incredibly popular effect because it sounds like sweeping or ‘whooshing.’
To imagine the audio effect, you can think of an airplane. In movies, when a plane is flying close to an object or low to the ground, you can hear a whooshing sound.
This is pretty close to the sound that flanging creates.
The plane uses air to create this effect, flanging is a little different. To produce the flanging effect, you need two audio signals. Both signals should be identical, with the exception of phase.
One of the signals will start a period of time later than the other. The period, or phase, is usually incredibly small.
Most of the time it’s a fraction of a second, 20 milliseconds or fewer. And, the phase isn’t constant. It changes as time goes on.

When these two signals mix out of phase, a few interesting effects can happen. Out of phase means that the peaks and troughs of the waves will meet at different times.
Most of the time, the peak of one wave will play while the other wave is still building up. This amplifies the first signal, making it sound louder.
But, since the phase change is not constant, that will change. At some point, the peaks of both waves will meet. We call this harmony.
Both waves will intensify each other, making them sound much louder. Another term for this is constructive interference.
After a short period, the peak of one wave should meet the trough of the other. Yes, you guessed it, this creates destructive interference. When this happens, the signals cancel each other out.
So, the overall sound should get louder gradually and hit a peak. Then the sound will gradually decrease until it goes silent.
Keep in mind that this all happens in a fraction of a second. This rapid change in volume causes the flanging effect.
If the lagging signal jumps and becomes the leading signal, we call it zero-point flanging.
Depending on the phase shift you choose, the effect will sound slightly different. Still, you can increase the delay to a point, before it ruins the effect.
We call the tool that creates the flanging effect a flanger.
Flanging Effect
People have been using flanging for decades. Even before it was easy to use the effect.
The effect of the flanger is very distinct. It distorts the sound to some degree and makes it sound fuller.
The sweeping sound that comes from flanging makes the recording sound much louder. You can also place them strategically to enhance vocals.
Many artists would use this effect if they had weaker-sounding voices. Flanging would make them sound much better.
This came in handy many times over the years. Many recording artists, including John Lennon, would ask for flanging on their records.
Flanging is far from the only type of audio signal processing. There are many others, and some give an effect similar to flanging.
Chorusing
Chorusing is similar to flanging. Both of them involve mixing two signals together.
The main difference is that in chorusing, the delays are much larger. Chorusing uses a phase delay anywhere from 20 to 50 milliseconds.
That’s right on the border with flanging. This is why flanging and chorusing can sound similar.
But, there is a difference. They both intensify the sound, but flanging has a more distorted effect.
To make this a little clearer, think about a chorus. In a chorus, you have a large group of people, all with different voices.

Not all the members will start singing at the same time. There’s a tiny delay from each person to the next.
As the song goes on, each member’s voice will interact with the rest of the team. The effect of these interactions can cause a little distortion to the overall sound.
But, the main thing you notice is how full the sound is. Even if it’s a small chorus.
The constructive interference is much more apparent in chorusing. This is why the voices sound louder.
And, it also provides more opportunities for harmonies. That’s why choruses sound so good.
Some instruments like the chordophone have built-in chorusing capabilities. But, to achieve this effect with other instruments, you’ll need software or an amplifier.
So, because of the longer delay time, chorusing is a much cleaner sound. There is a tiny overlap between chorusing and flanging, but most of the time, you can tell them apart easily.
Phasing
Yet another audio effect that mixes two waves. Phasing is when you have two identical waves, and you flip the phase of one of them.
This means that peaks and troughs of the two sound waves will meet often.
This gives a ‘choppy’ effect. The sound will cut in and out, making it sound kind of robotic. That’s why many artists use this effect to make their music sound ‘electronic.’

The biggest difference between phasing and flanging is the smoothness of the sound. They both distort the sound, but phasing makes it sound a lot more alien.
You can achieve phasing in many ways. The best one would be a phaser, you get much more control. But, if you don’t have access to a phaser, you can download software that can help.
History of Flangers
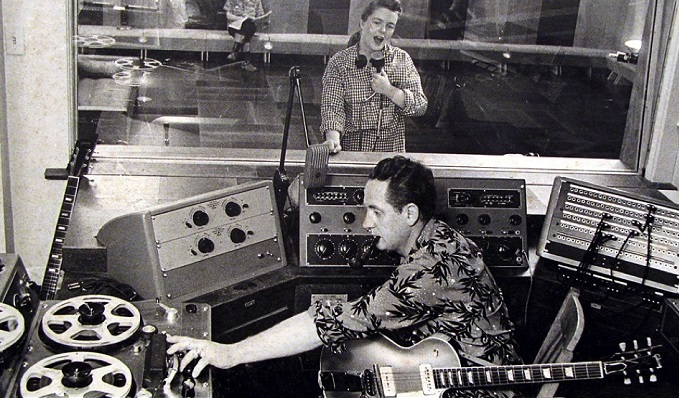
The story starts with an American jazz musician, Les Paul. In the late 1940s, Paul introduced flanging to some of his songs.
To create this effect, he would use acetate discs. These are similar to vinyl records, but acetate disks are heavier and much more rigid.
Paul would use an acetate disc with a variable speed record player. He noticed that when the playing speed changed rapidly, the sound of the signal changed.
That effect was flanging. This combination of disc and player would be the earliest version of a flanger.
By the early 1950s, Paul was using two record players to achieve flanging. One of the players had variable speed control.
This meant that the note could be playing on one recorder, and he’d speed up or slow down the other.
Creating the flanging effect with the recorders was possible. But, it was far from easy.
It took a long time to figure out when exactly to play both recorders. And it was hard to recreate the sound over and over.
It was a tedious process. It could get even worse when you involve singers. Recording the song twice, with both recordings being identical, was challenging.
People used this method for years. It wasn’t until the spring of 1966 that someone came up with a better way.
The next development in flanger came from Ken Townsend. Townsend was a sound engineer working at Abbey Road Studio.
While working with the Beatles, John Lennon would have to record many vocals twice. This took a lot more time and effort.
After a while, he asked Townsend to come up with a way to make it easier. His answer to this problem was automatic double tracking (ADT.)
Double tracking is exactly as it sounds. You make a double, or copy, of the track. ADT would automatically make a copy of your audio as you’re recording it.
To achieve ADT, Townsend used tape recorders. All you’d have to do was push the record button.
After recording, you’d have 2 copies of the same exact file. This gave Townsend the two audio signals he needed to flange. And they were identical.
There were many iterations of the tape recorder flanger. Different people would tweak the process and streamline it over time. This goes on until our present day.
Today, our flangers are a little more advanced. They can allow you to flange in real-time and you have much more control over the phase shift.
There are a few different types of flangers. Some are digital, while others are analog.
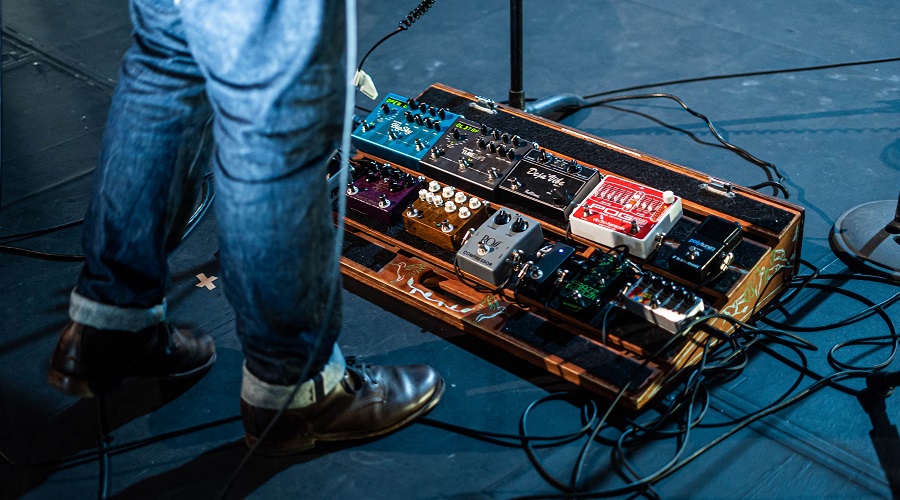
You can even get software that can act as a flanger. But, the most commonly used flanger is a pedal.
How Does a Flanger Pedal Work?

Now that you understand the concept of flanging, you must be wondering how you actually apply it.
Well, flanger pedals work on low-frequency oscillators or LFO. The LFO uses frequencies that are below the human hearing range.
We can’t hear the frequency, but it has a huge effect on the sound of your input. The LFO emits a waveform. This waveform can interact with your input and change it.
Most flanger pedals have a similar layout. The input is where you plug in your instrument and the output is for amplifiers.
Once you have your flanger connected, you can look at the controls. The flanger gives you control over a few factors:
Mode
Most of the time, this control is on the left side of the pedal. This lets you control the flanger effect on the sound.
Depending on the model of your pedal, you should find a few different modes:
- Standard: Gives you the basic flanger effect
- Ultra: The flanger effect is much more intense
- Gate: Only in mono mode and creates large changes in output volume
- Pan: Only in stereo and gives the sound a feeling of rotation or spinning
Many flangers also have a momentary mode. When you’re on stage performing, it can be tricky to use the flanger pedal.
The momentary mode is more of a button than a switch.
If the mode is on, as long as you have your finger on the button, the flanger is on. Once you release the button, the flanger effect stops.
This can come in real handy if the piece you’re performing has a lot of flanging.
Manual
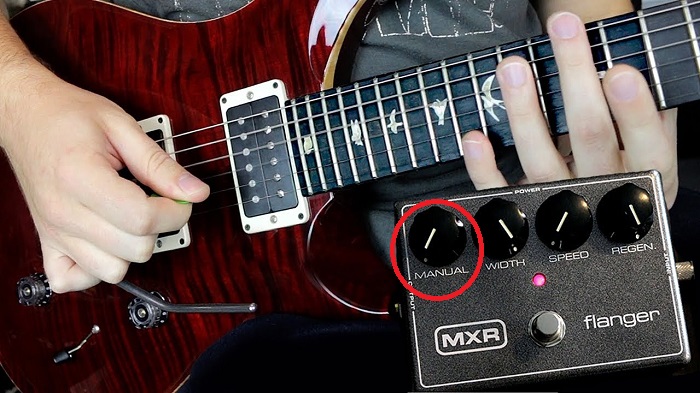
The manual control set the LFO offset. To offset a wave means to change it.
This control can increase or decrease the frequency of the LFO waveform. Turning it clockwise will increase the frequency range.
The range will determine how much you change your original input. How much control you have over the range will depend on the mode and instrument.
The other controls will also have an impact on the effect of the manual control.
Resonance
The resonance control adjusts the feedback. In a flanger, feedback is when you feed the output signal back into the input signal.
There are two types of feedback:
- Positive: both the input and out are in the same phase
- Negative: input and output have opposite phases
The more positive feedback you have, the louder and clearer the flanging effect. And the opposite is true for negative feedback.
Positive feedback provides a much louder and clearer flanging effect. Negative feedback can give the output a hollow or thinned-out flanging effect.
As you turn the resonance controller clockwise, the flanger effect will increase.
Depth
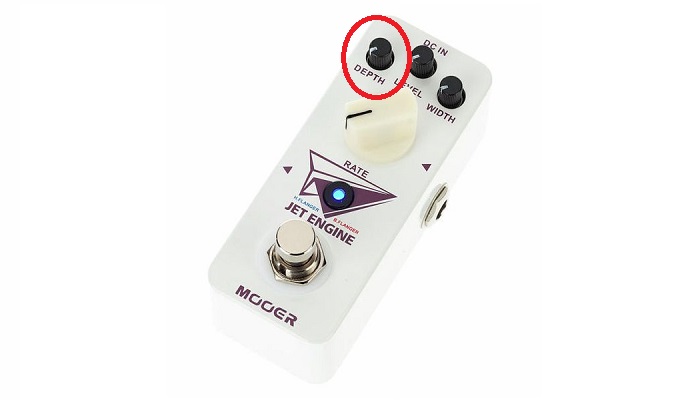
This part of the flanger controls the width of the LFO wave. The width, or amplitude, of the LFO wave, has a huge effect on flanging.
The depth controller allows you to choose the range that you want flanged. It adjusts the sweeping range, which is changes what notes the flanger affects.
Turning the depth control clockwise will increase the sweeping range. This means that more notes will get flanged.
If you turn the control all the way clockwise, you can do a sweep of the entire delay range.
When you increase the depth, the manual control becomes less effective. Having the depth control turned all the way up will make the manual control useless.
Rate
Rate, or speed, is pretty self-explanatory. It controls the speed of the LFO wave.
This will affect the frequency of the wave. And in turn, this will change the phase delay of the flanger. The more you turn up the rate, the higher the frequency.
Most of the time you’ll want to use rates on the lower side. Slower rates give a more defined flanging effect.
You can hear the effect much better and there’s less distortion.
Still, the faster rates can be pretty useful. With the rate turned up, you can achieve many special effects.
Mix

We call the unedited signal input the dry signal. Once that signal gets changed in any way, we call it wet.
The mixer is responsible for the wet to dry ratio, or how much of the original and edited signals we use. This ratio will affect the phase shift between your two signals.
Balancing this ratio can be tricky. The most destructive interference will happen at a one-to-one ratio.
Having the ratio lean more toward the dry side will decrease the effect of the flanger. As you add more edited signals, the flanger effect will intensify.
If your flanger doesn’t have a mix control, the default ratio is usually one-to-one. The flanger will still work great, it’s just you get the most phase cancelation.