
If you own a music equalizer or something similar, you’ve surely heard of the term ‘treble.’ But what is treble in music, exactly, and why is it important?
Treble, along with bass and mid-range, is made up of an infinite number of frequencies. Among all known music frequencies, treble is the highest. This article discusses everything you need to know about treble in music.
Let’s get right into it!
What Is Treble in Music?
The term ‘treble’ is derived from the Latin word triplum, which was used in the 13th century to indicate the third and highest range of motets.
Treble in music refers to the highest frequency of sound, usually ranging from 6000 Hz to upwards of 20000 Hz.
Increasing the treble’s sensitivity in an audio system results in a brighter, more detailed sound, as it emphasizes the tune’s high notes.
Why Is Treble in Music Important?
Treble in music is represented in different variations. In written music, treble appears as a music scripture called treble clef.
As you may have guessed, the treble clef, also known as the G clef, is used to indicate the pitch and degree of higher-sounding notes. It typically notates musical notes above middle C on the second-lowest line of the stave.
Instruments that use the treble clef include the flute, violin, horn, trumpet, cornet, and guitar, as well as all saxophones, clarinets, and more. Due to the popularity of these instruments, the treble clef is the most used clef in Western music notation.
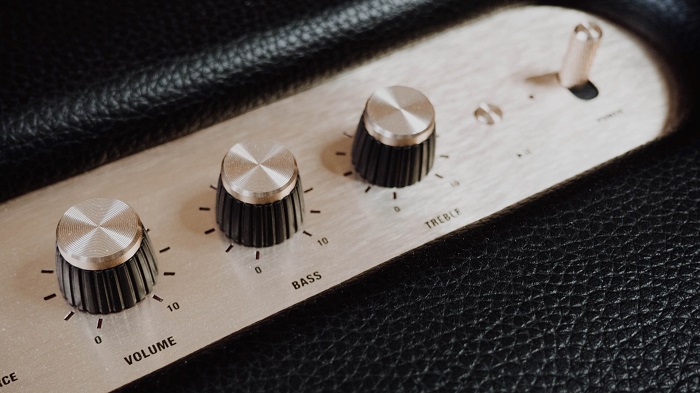
Treble likewise appears on audio devices as equalizers, usually paired with bass and mid-range. Increasing the treble on your audio system doesn’t change the song’s overall tone; it merely emphasizes the tune’s higher notes, therefore creating an airier, clearer sound.
For instance, increasing the treble’s frequency in a radio tends to make the sound of the presenter’s voice more comprehensible.
As a rule of thumb, the lower the treble, the more mellow the sound.
Lower treble frequencies may not suit certain genres, as it may make the song sound weak and lacking in power. On the other hand, high treble frequencies may make certain songs increasingly ear-piercing and uncomfortable to listen to, particularly with classical music.
What Is the Difference Between Treble, Bass, and Middle?
Treble, bass, and middle are all used to cut or boost certain frequencies of sound from your speaker.
As mentioned earlier, treble corresponds to frequencies ranging from 6000 Hz to 20000 Hz. Bass, on the other hand, corresponds to anything up to 150 Hz. The middle (mid) band is less easy to pick out by ear, ranging between 200 Hz to 5000 Hz.
Bass is the complete opposite of treble. Treble is the highest point of a frequency range, while the bass is the lowest. It represents pianos, keyboards, and human voices, all of which are capable of creating low bass notes.
In an equalizer, turning the bass to its highest value allows users to feel the pounding bassline of a song. It causes furniture and walls to rattle, especially when paired with EDM and hip-hop music genres. However, too much bass may turn a mix undefined and muddy.
Bass produces slower, bigger vibrations (ghost tones), while treble produces faster, smaller vibrations (overtones). Every note in between bass and treble is called middle, or simply mid. Increasing an equalizer’s mid knob emphasizes the notes that sit in the middle sound spectrum.
What Is the Ideal Equalizer Setting?

For many people, the ideal music equalizer setup is placing all three knobs right in the middle. However, this doesn’t usually cover all types of music genres.
In theory, there’s no “right” or “wrong” way to equalize your sound system, as it all depends on personal preference. Some people like stronger, deeper bass while others prefer cleaner, sharper sounds.
Likewise, it also depends on the quality of your equipment. Some sound systems play bass better than treble, and vice versa. Low-quality systems can’t handle a lot of bass without creating a significant distortion, while others power through it quite easily.
In the past, sound systems only had one equalizer knob. The lower the frequency, the lower the bass.
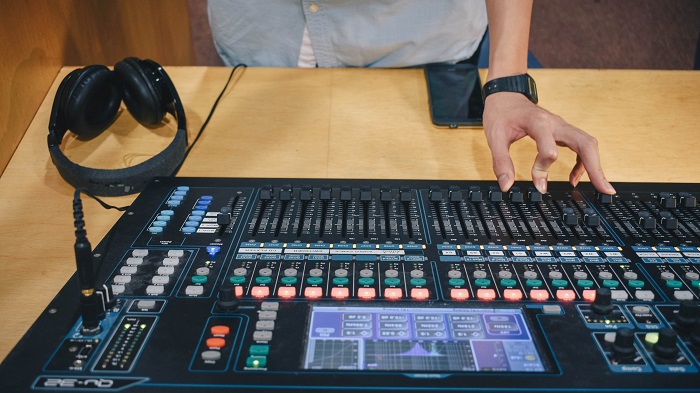
Today, most equalizers have three knobs for bass, mid, and treble frequencies. Professional systems may have anywhere between 10 to 20 knobs. This amount of control also contributes to the overall quality of sound.
It’s also important to note that sounds respond differently according to their frequency and the material they bounce off of. For instance, hard, flat surfaces reflect a lot of treble, while soft, pliable surfaces absorb a lot of bass.
Regardless of your preference and all the mentioned factors, the best way to equalize your sound system is to start at the neutral or halfway position.
Many professionals recommend the bass, mid, and treble ratio of 4:5, as it gives users more control and allows the treble to shine through bass and mid sounds.
For TV, the best bass and treble setting is usually 45% and 55% respectively. This ratio yields a cumulative balanced frequency spectrum that most find better to listen to.
Advantages of High Treble in Equalization

There are multiple benefits to setting your treble’s equalization to a higher point. Some are as follows:
Balances Low-End Rumble
Songs with high bass typically result in the low-end rumble, a bass frequency below the 440 Hz mark. Too much low-end rumble might overpower the treble, making the song almost impossible to listen to and enjoy.
This is where high treble comes into play. Music producers use treble to balance the low-end rumble in an audio track by boosting the key frequencies of the bass.
Treble also equalizes any extra frequencies that disturb the overall tone of the song. Usually, these frequencies are set between the 50 Hz to 250 Hz mark.
When equalizing a song, it’s important to check the values between the treble and bass in order to produce a cohesive result.
Reduces the Muddiness of Mid-Frequency Sounds
Muddy frequencies usually occur when you increase the bass of an audio track.
Muddiness usually appears in the 400 to 800 Hz frequency spectrum, a region that many music producers and mixers find problematic. This is why most professionals keep the treble higher than the bass.
Apart from increasing the song’s treble, the best way to reduce muddiness is by getting the right source and managing the low-end through the stereo field, as well as maintaining good headroom.
You can also rebalance a track and tone down the midrange muddiness by boosting the lows (bass) and adding some shimmer to the highs (trebles) through your favorite shelving equalizer.
Creates Clearer Vocals

If the audio track has vocals, the treble should always be higher in equalization. This is because treble brightens the song’s vocals, creating a clearer, more comprehensible sound.
For this reason, users who listen to old-school radio and poorly recorded songs increase the equalizer’s treble to correct its overall sound.
Increasing a song’s bass lowers the visibility of its vocals. Keep in mind that the vocals usually fall in between the 700 to 3000 Hz frequency range. When you increase the bass, this region is overpowered, muddling the singer’s voice.
If you want crystal clear vocals, increase the treble. However, increasing the treble too much results in a harsher, jarring sound. You’ll find most of the vocal’s brilliance around the 5000 to 8000 Hz mark. Experiment on the song’s treble until you nail the vocals perfectly.
Unfortunately, there’s no “best” equalizer setting for vocals. It all depends on the singer’s tone of voice and the instruments that surround him or her.
What Is the Best Way of Setting Up My Equalizer?
When setting up your equalizer, professionals recommend getting a real-time analyzer (RTA) to measure the sound of your system in all kinds of listening spaces.
The RTA tool displays an audio’s frequency spectrum in real-time in between 3 to 6dB increments. Advanced RTA software has the ability to display 0.1 dB resolution as well as 24 or more measurements per octave.
If your equalizer consists of more than one tuning option, such as automatic equalization, digital sound processing, and time alignment, it’s always best to refer back to the device’s manual.
Otherwise, follow the below steps to tune your sound system:
Step 1: Play Your Favorite Song
Choose a song you know inside and out, preferably one that you don’t mind listening to over and over. As much as possible, play a song with a lot of note variation and instruments. It should include high notes (treble), mid-range notes, and low notes (bass).
Set up your RTA tool and list down the song’s frequency range, as follows:
- 20 Hz to 60 Hz: sub-bass; very low frequencies, usually produced by sub-bass and kick drums
- 60 Hz to 200 Hz: bass; low frequencies, produced by bass or lower drums
- 200 Hz to 600 Hz: lower mids; low mid-range frequencies, produced by the lower end of musical instruments such as piano or guitars
- 600 Hz to 3000 Hz: mid-range frequencies, produced by most mid-range instruments and vocals
- 3,000 Hz to 8,000 Hz: upper mid-range frequencies, produced by the upper end of musical instruments such as flutes, violins, or guitars
- 8,000 Hz and above: high-frequency sounds, highest the human ear can perceive; frequently used to create the atmosphere of a song
Step 2: Set the Tone According to Your Preferences
Listen to the song you’ve chosen several times and ask yourself this: what changes do I want to make? Trust your ears while adjusting the tone. Sound is entirely personal: what others find “perfect” may be less than ideal for you.
Before anything, keep in mind that some settings work best with certain genres.
For instance, acoustic music is best heard at lower bass ranges to boost the singer’s voice and instruments. Electronic music, on the other hand, highly depends on bass rather than treble. Pop music works best with high mid-range frequencies more than anything else.
When it comes to drums, boosting lower-mid frequencies is a must. According to Timbaland, one of the world’s most reputable music producers, the best EQ setting for drums is 50 to 100 Hz for the kick drum and 500 to 3000 Hz for the snare.
As for the guitar, boosting it at around 3000 Hz helps the strums cut through the mix. Boosting it to around 150 Hz adds heaviness to a guitar tone that most find soothing and desirable. If a honking tone appears around 1000 to 2000 Hz, lower the treble frequencies to smooth it out.
With that in mind, don’t forget to keep track of what you’re changing, just in case you want to go back to how your system had sounded before.
Step 3: Find the Bad Frequencies

Once you’ve adjusted the settings according to your preference, listen to your song of choice from the start. Is there a particularly harsh sound that conflicts with the overall tone of your song?
If the answer is yes, find the bad frequencies and cut them down. Usually, you can do this with a high Q narrow-band filter, a feature available in most sound systems.
Sweep through the song until you find the part you find undesirable, where you can then lower the Q. Doing so gets rid of the unsavory aspects of the song without distorting or introducing noise, therefore creating a natural-sounding tone.
How Do I Enhance or Fix the Treble In My Mix?
Without sufficient treble, the high-register instruments and vocals in your mix will bleed together, losing their definition. Here’s how to enhance and fix the treble in your mix apart from increasing the frequency:
- Install tweeters into your sound system, particularly with a high-frequency threshold
- Enhance the song’s saturation
- Smooth out distortion and harshness through tape emulations
- Reduce undesirable treble frequencies and replace them with new ones
- Add digital treble grit through Bitcrusher
- Use pre and post EQ to smooth out distortion